
When it comes to selecting a receiver module for your FPV goggles, the usual recommendation is to use the True-D or LaForge modules – they offer great performance for a reasonable price. On the budget end you can pick up a Pro58 module from
In this guide, I will show you how to flash (or install) new firmware onto your
What you need
Unfortunately, it’s not a matter of just plugging in a USB cable, since the pro85 does not have one – so there are a few things you need to buy:
The below items are optional but I would recommend them as it lets you connect the programmer to your pro58 module without any soldering. These can also prove invaluable for other electronics projects.
Download software and drivers
You will need to download the software for the ST link programmer, and also some drivers for the device. You can get both from the ST website. The only hassle here is you need to register on their website as they send you the download link via email, so don’t use a fake email address! Alternatively, you could download it directly here from our google drive

You will also need to download the firmware to run on your pro58 module. You now have two three options here, Wpro58, Pirx or Achilles firmware.
Wpro58 Firmware
This is totally free and open source thanks to the impressive work by piodabro (and others). The link below is to the list of firmware releases. I suggest you use the latest stable release (not the beta/alpha versions).
Pirx Firmware
This is another free firmware that has a bit more focus on a nice user interface and features. I have not yet used this firmware myself, but overall opinions from people who have tried this on the internet are very positive. It definitely sounds like it’s worth a go!
Achilles Firmware
The Achilles firmware costs about 11 Euro and is well worth it if you want to have a bunch of useful features like
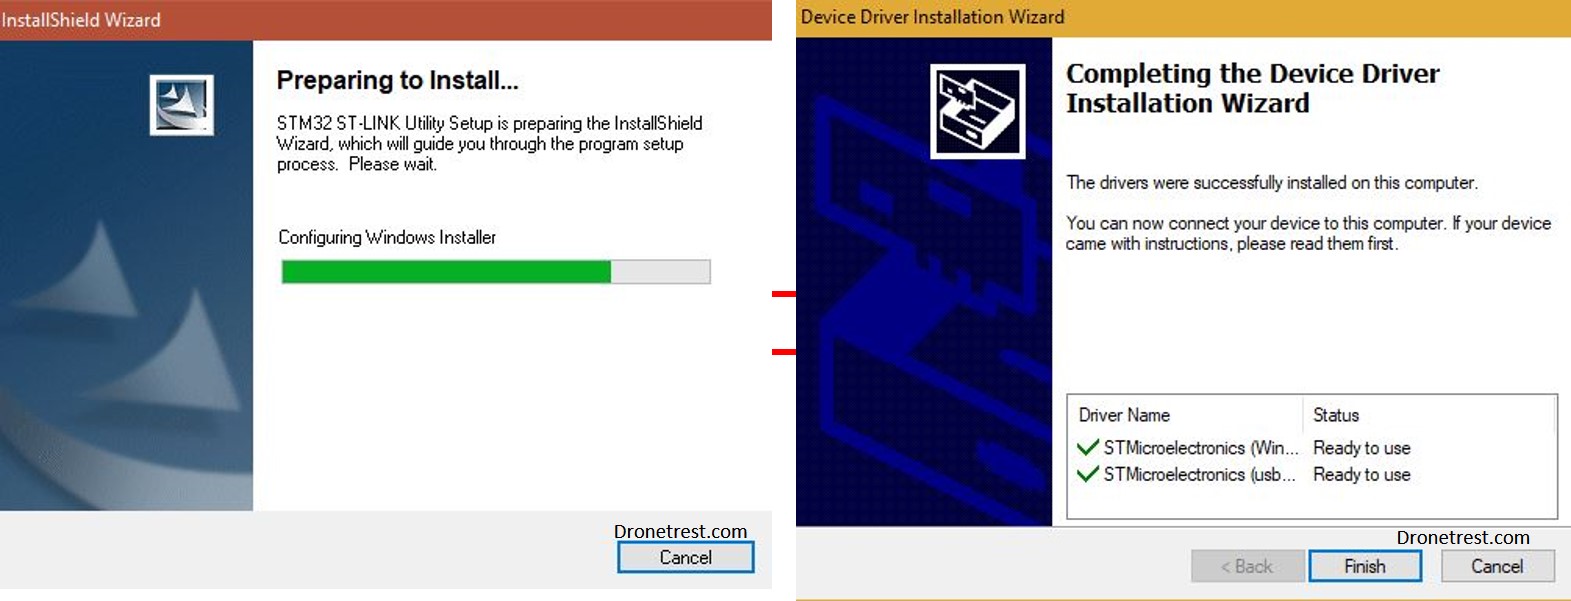
Install ST-Link Software and drivers
Now that everything is downloaded, you need to install the ST-Link firmware flasher software and the drivers for your ST-Link USB programmer. Follow the setup instructions and at the end of the install it should ask to install the drivers. Once done you should see two new devices installed. Now its time to hook up the programmer to your pro85 module.
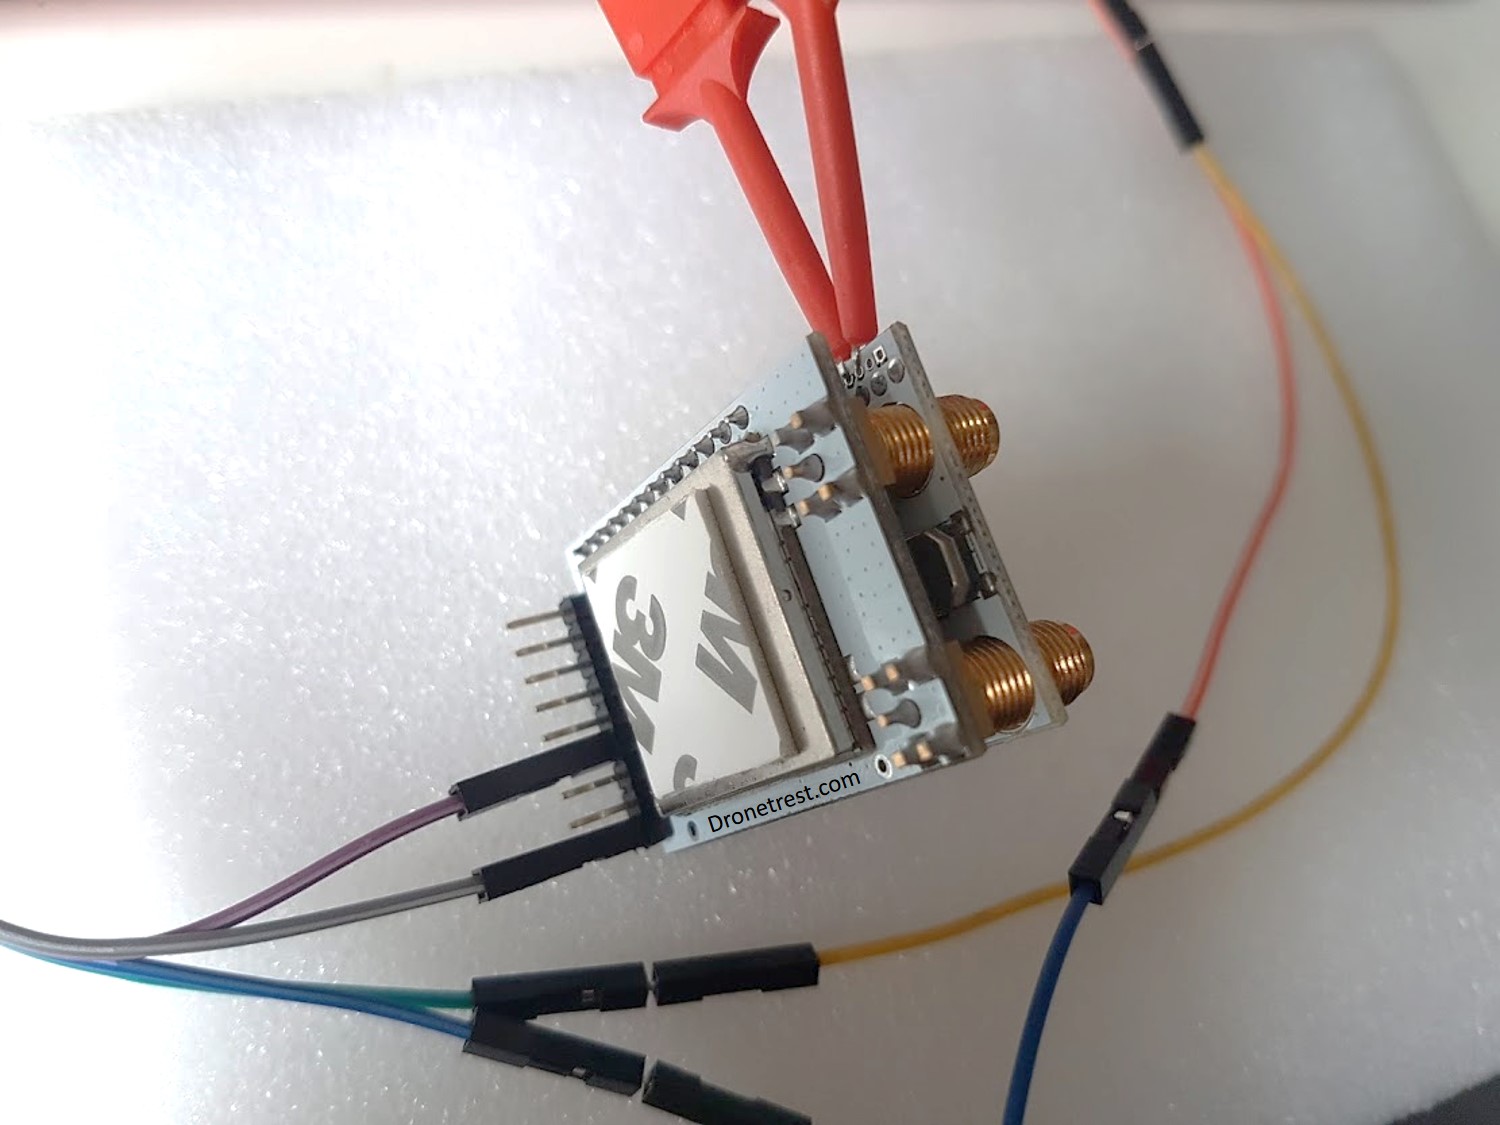
Connecting the ST-Link to your Pro58 module
Now you need to connect the ST link programmer to your Pro58 module as shown in the diagram below.

- SWCLK form Stlink goes to SWDCLK on Pro58
- SWIO from Stlink goes to SWDIO on Pro58
- GND from Stlink goes to GND on the back of the Pro58
- 5V from Stlink goes to 5V on the back of the Pro58
If using probes and jumper wires your pro58 module should look something like this:
Flash the firmware
Now you will open the ST-LINK utility you installed. Once the software is open, plug in your ST linker device into your PC. If the pro58 module was connected correctly you should see it starting up now. If not, double check your connections.
Once connected you should notice some text appear at the bottom of the window
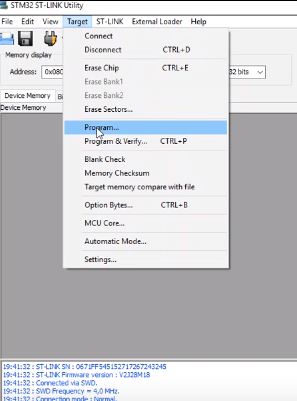
Now go to target>program menu along the top bar.
A window will pop up and ask you to select the .bin firmware file you want to load. Select your firmware file (which will be a .BIN file) that you downloaded previously, and click open.
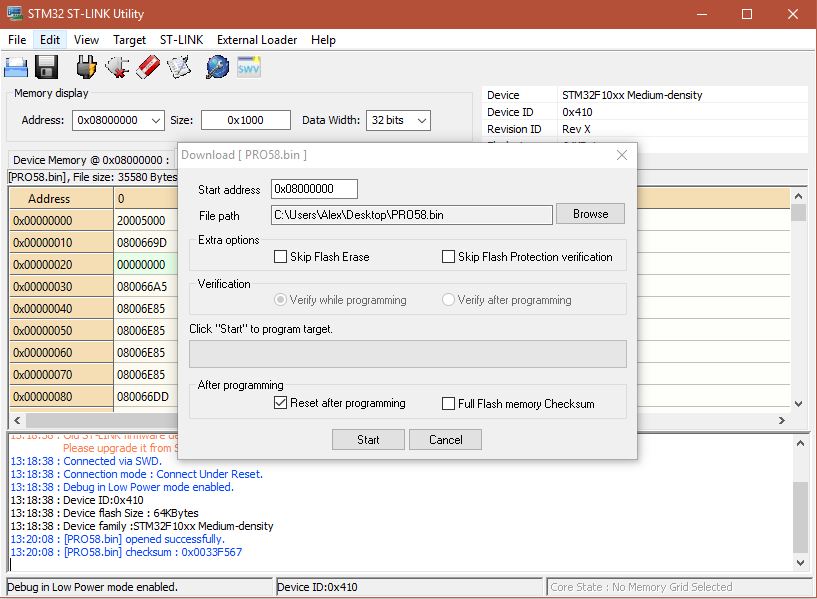
Now click the start button and after a few seconds the firmware should be installed on your Pro58, and the device will reset.
If you loaded the Achillies firmware, when the device has booted up you will see a number, you need to send this number to Achillies FPV and they will add it to the firmware to unlock it. After 24 hours you will need to download the firmware again from their website and it will now be unlocked on your pro58 module.
Calibrate RSSI
The last thing to do is to connect your video transmitter (preferably a 25mW one) and calibrate the RSSI. To do this, just navigate to the settings menu and follow the instructions.


