The wizard X220s takes what we love about the standard Wizard X220 and cranks it up to 11 with impressive performance. This article will help you get your Wizard X220s into the air quickly and also tweak some settings for optimal performance.
⚠During any configuration of your drone please ensure the propellers are removed from your quad!
Where to Buy
Connect your VTX antenna but not your propellers
It’s best practice to always have your VTX antenna connected to your video transmitter to avoid damaging it. If you power it on without any antenna, the signal does not have any method to dissipate the transmission signal so you can overheat or fry your VTX module this way, best to keep it on all the time.

Also, you might be tempted to install your propellers, but for safety reasons, we will keep them off during the initial setup as you don’t want to lose a finger.
Charge your Battery
The battery included with your wizard should arrive about half charged (just like most other lithium batteries) as this is the best voltage to store them at to avoid any damage to the battery chemistry. So before you go out and fly you will need to charge it up.
Using the included charger is relatively simple, just plug it into a wall socket, hook up your battery and patiently wait for the LED’s to turn green. After an hour or so the battery will be fully charged so be patient and also do not let the battery charge unattended!

I would also suggest that you read our battery care guide, as if the battery looses too much voltage (if you fly for too long), you can no longer charge it and the battery can become damaged. This is something that is not typically covered under warranty.
Betaflight GUI
If you don’t already have the Betaflight GUI software (Chrome App) on your PC, you will need to install it via the Chrome web store

Connecting to your Wizard
Connect your wizard to your PC via a micro USB cable, once connected you should see some LED’s turn on inside to indicate that your quadcopter has power via USB. Don’t use a USB hub as sometimes these done provide enough power to power the flight controller on the quadcopter.

With the betaflight GUI app open, you can connect your Wizard X220s to your PC. Assuming you have the correct drivers when you click the connect, the software will connect to your quadcopter.

If you get an error or you cant even select the connect button, then there is likely a driver issue on your computer. I suggest you check out our driver fixer guide to get the correct driver (and driver version) installed on your computer. Also, you might want to try another USB cable, or USB port on your computer just in case.
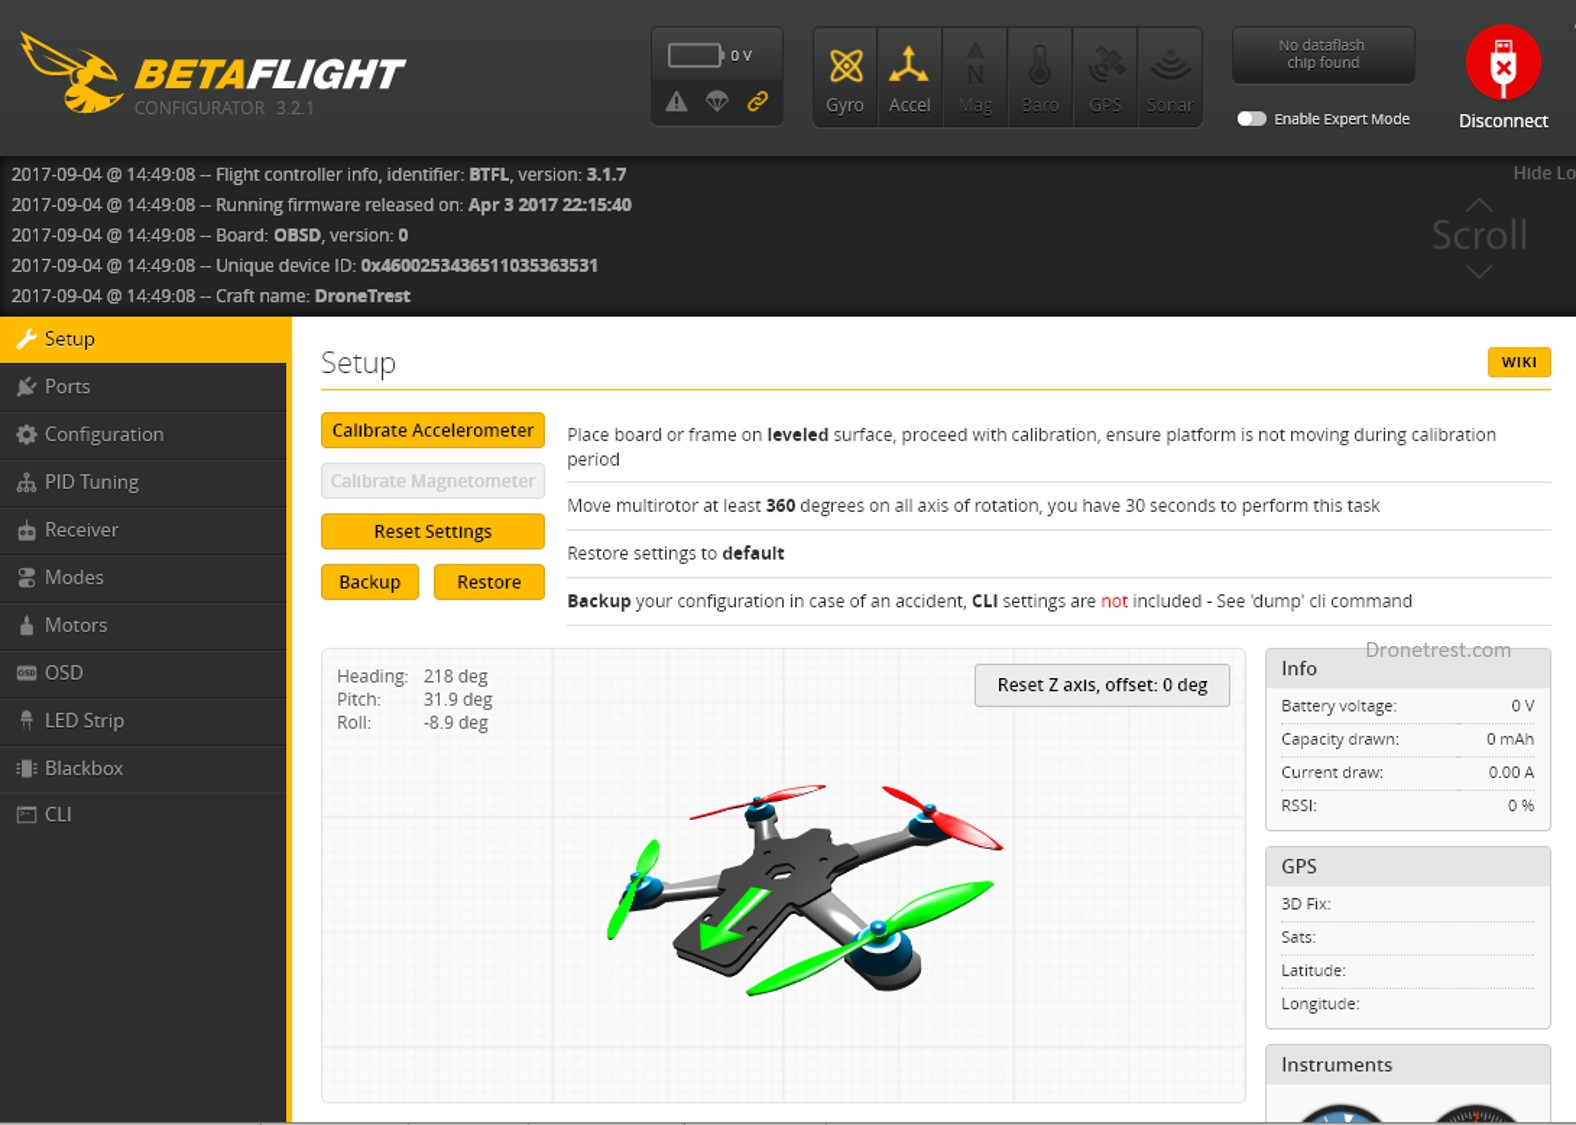
Once connected you should see something like the image above. You will see a 3D model of a quadcopter that should move as you move your actual quadcopter. Now we can do the initial setup and testing of the quadcopter.
Calibrate Accelerometer
When your wizard is posted to you, sometimes it can take a few knocks (especially if the courier decides to play some football with the parcels between deliveries). So the sensitive IMU units might need a re-calibration. Fortunately, this is super easy, as its just one button within betaflight.
Simply place your quadcopter on a surface you know is level, and make sure that there are no vibrations or micro movements. Then simply click the calibrate accelerometer button on the Setup tab.

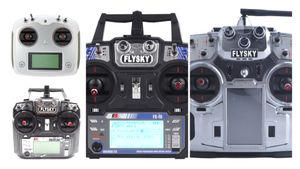
Setting up your Radio
The worst thing about the wizard X220s is that the radio does not arrive setup at all, so this is where most of the setup is involved. The stock setup uses the two rotary knobs to change between modes, but its just about impossible to do this why flying as you cant let go of the sticks for long. So here we will change this so the flight modes will be changed via a 3 position flick switch, and we will use another 2 position switch to arm/disarm the quadcopter.

The first step is to change the radio settings so that we use the switches instead of the knobs. To do this, please read our Flysky Radio setup guide which covers the setup process for the radio and come back to this article. In that guide, you can ignore the binding process as the wizard already arrives bound to your radio.
Testing your receiver
Now that you have configured the switches on your radio, the next step is to make sure that everything is working correctly. To do this, you go to the receiver tab within betaflight.

On this tab, you will see a bunch of bars that represent the inputs from your radio. When you move a stick on the radio, the corresponding bar should move. For example, when you move the roll stick, the roll channel should move.
If you find that when you move the once stick, but a corresponding channel moves on the display, then you just need to adjust the channel mapping. This video for cleanflight software, but the process is exactly the same in betaflight.
If you don’t see anything moving, make sure your battery is connected to your wizard (so that the receiver has power) and of course that your radio is on. If both are on, then I suggest you try to rebind your wizard to the radio (as per our flysky radio setup guide mentioned before).
The other thing to check is to ensure your radio settings are correctly configured within betaflight. In the case of the RTF wizard X220s, you need to check the ports tab,

Testing the motors
While you still have the battery connected, and props removed it is a good idea to check the motors. YOu do this via the motors tab within betaflight.
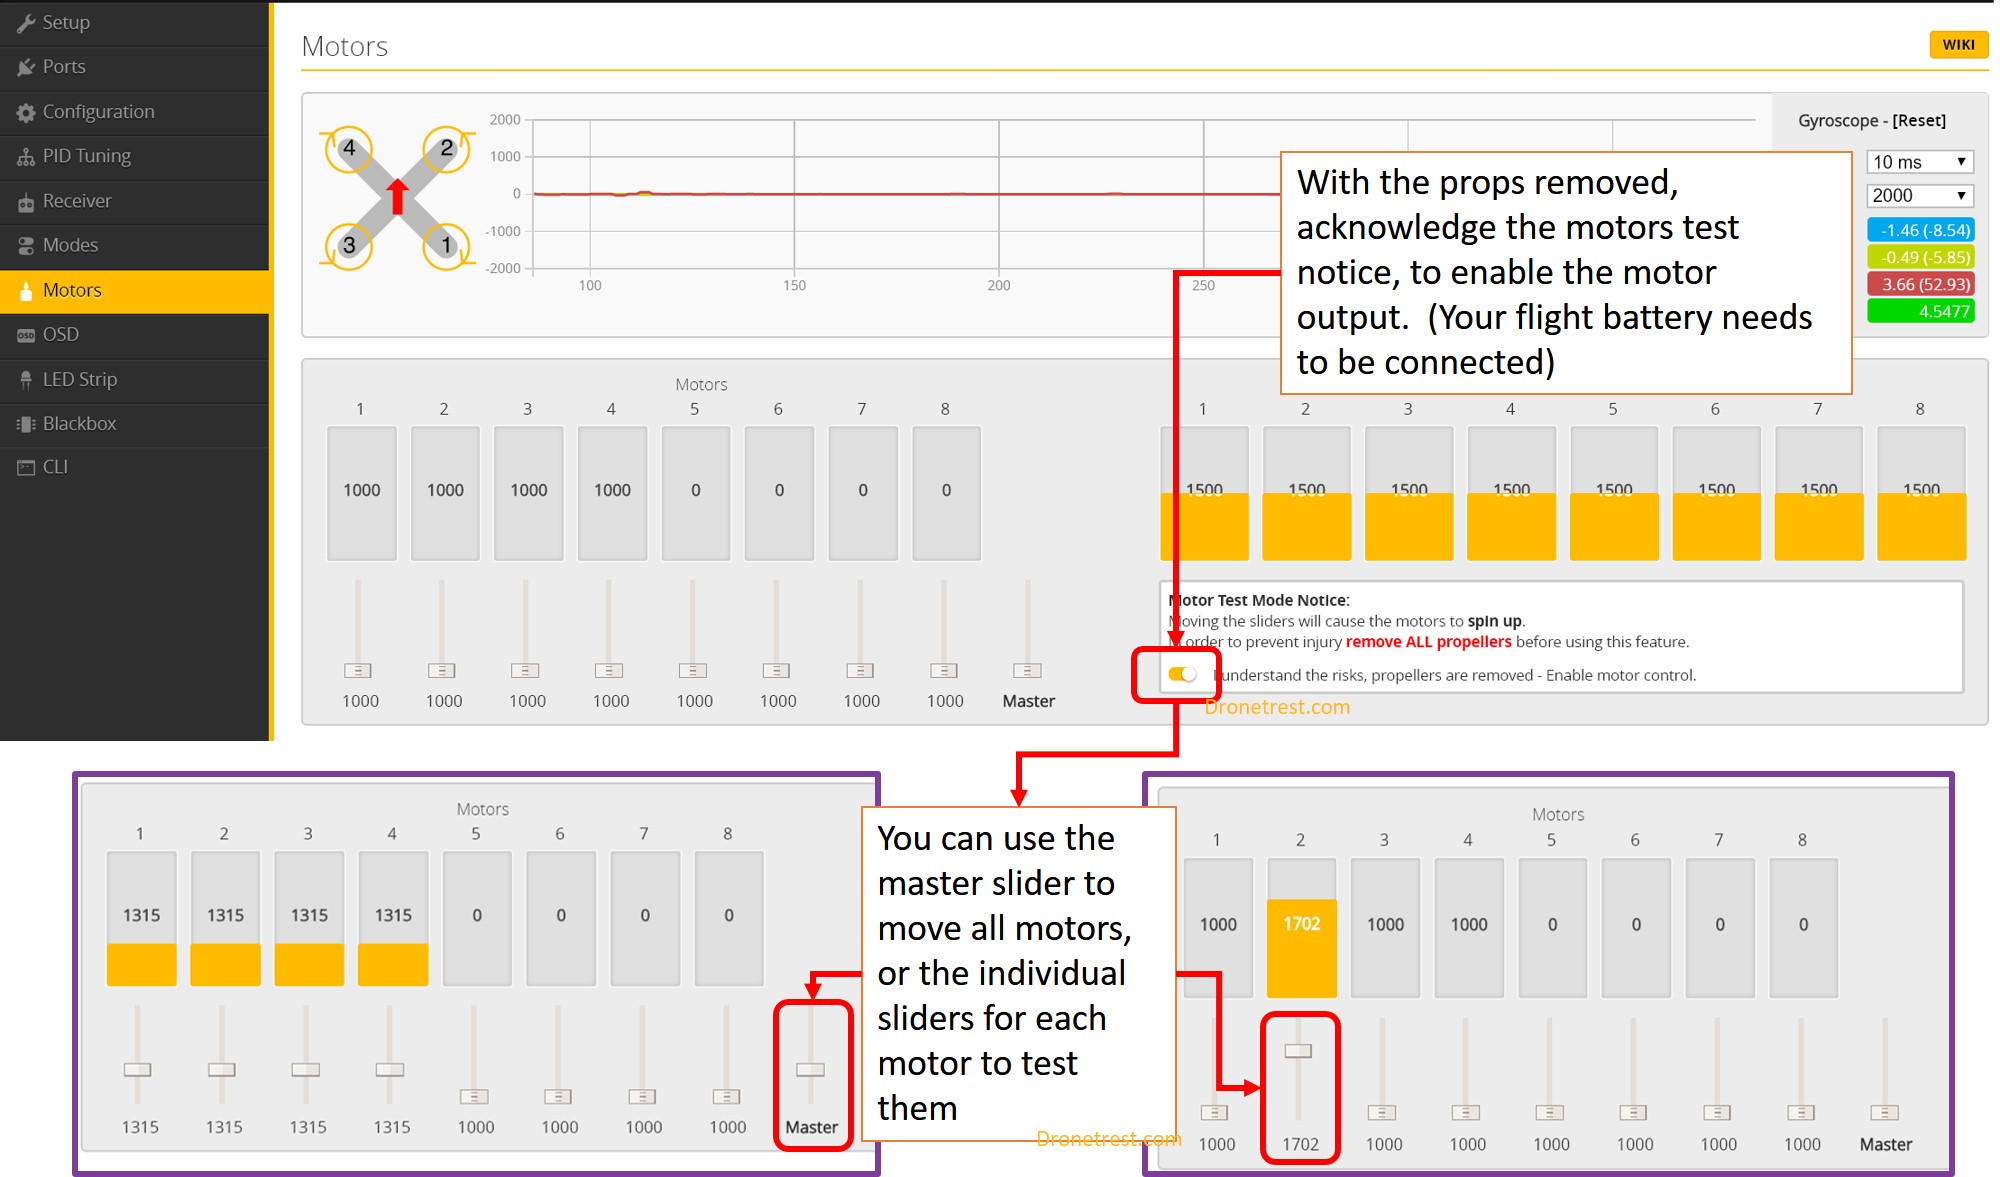
Here you need to select the master switch which will arm the motors. Now when you move the sliders you can test each individual motor, or all of them together. Make sure they all start at the same time and spin in the correct direction.
If you find that one of them don’t work, please double check your battery is connected and fully charged. If it is then you will need to contact the seller as it’s likely that either the ESC or motor is faulty.
Setting flight modes
Before you go out and fly, you should setup the flight modes for your quadcopter. Assuming you are reading this section you are a beginner so I suggest you configure your flight modes according to our beginner flight modes article.

Enabling Vbat for OSD
Depending on the version of the wizard you have, it’s worth double checking that you have Vbat enabled. This setting makes your flight controller measure the battery voltage of your quadcopter, and can also display it on the OSD so you know how much charge you have left.

When flying, if your battery voltage drops below 12.8V (or you hear the buzzer beeping continuously) you want to make sure you land as soon as possible. It’s also worth noting that as you crank the throttle up the battery voltage might drop temporarily, this is normal. However, when you are hovering or flying gently and you see the voltage constantly below 13v, or you hear the beeper then you know it’s time to land.. and quickly.
Attaching the props
Now that the configuration is all done, we can finally attach the props and get ready to fly flying. Since each motor spins in a specific orientation, you need to make sure to attach the correct propeller onto each motor.
When looking closely at a propeller you will see some writing on it, this number represents the propeller size, and also the spin direction. The R is for clockwise propellers, and the other is for a counter clockwise spin.

Simply attach each prop to the correct motor according to this diagram. Make sure each propeller is pushed all the way down, and the nut on the top is also tightened all the way.

Be careful not to over-tighten the nut, as this can strip the thread on the shaft. YOu only need to make sure the nut and prop are sitting flush with no gaps between.

Mounting the battery
When attaching the battery to your wizard x220s, it is important to ensure that the cables are not going to catch on the propellers. To do this, it’s best to secure the balance charge lead with the velcro battery straps. The main XT60 lead points upwards to avoid contact with the props.

Also if you are not using the GoPro camera mount (I don’t suggest you attach an expensive GoPro until you are confident at flying), you should try to mount the battery as far forward as possible. This keeps the centre of gravity in the middle of the quad for best stability.
(Bonus) Adding your name to the OSD
Although this is not required, it is something I like to do. By adding a craft name, you can display your name on the OSD. This is helpful if flying with other people to identify your FPV feed. It’s super easy to enable. Firstly on the Configuration Tab, you enter and add a name in the craft field section. Then within the OSD tab, you just need to enable the craft field slider, so that this will show on your OSD feed. If you want to reposition it, or anything else, just drag it to where you want it to display.

Updating Firmware
From time to time there are new firmware releases for betaflight that improve performance and add new features. It’s generally a good idea to use the latest stable firmware release of betaflight so please read our guide on how to update the firmware on your Wizard X220s. After a firmware update, you will also need to check ver some settings as sometimes they will be overwritten to the default values. If you want to update the firmware, see our Wizard X220S Firmware Update Guide (coming soon).
Hope this article has helped you out, if you have any questions about your wizard quadcopter, just ask in the comments below! Also if you found this article helpful, I will apprecaite it if you can consider buying something from Unmanned Tech (UK), or via Banggood, as we get a small commision from any sales we reffer to help fund this website.