Recently, version 2.0 firmware has been released for the already impressive TrueD FPV receiver. This new release brings general optimised firmware to make using this unit faster along with better filtering and smoothing algoritms to increase signal reliability. In this guide I will show you how you can update the firmware if you want to update the firmware yourself.

What you need
- FTDIBasic or similar
- Connector cables, I used female-female jumper wires, but servo cables will also work
- USB Cable (Regular Mini USB cable).
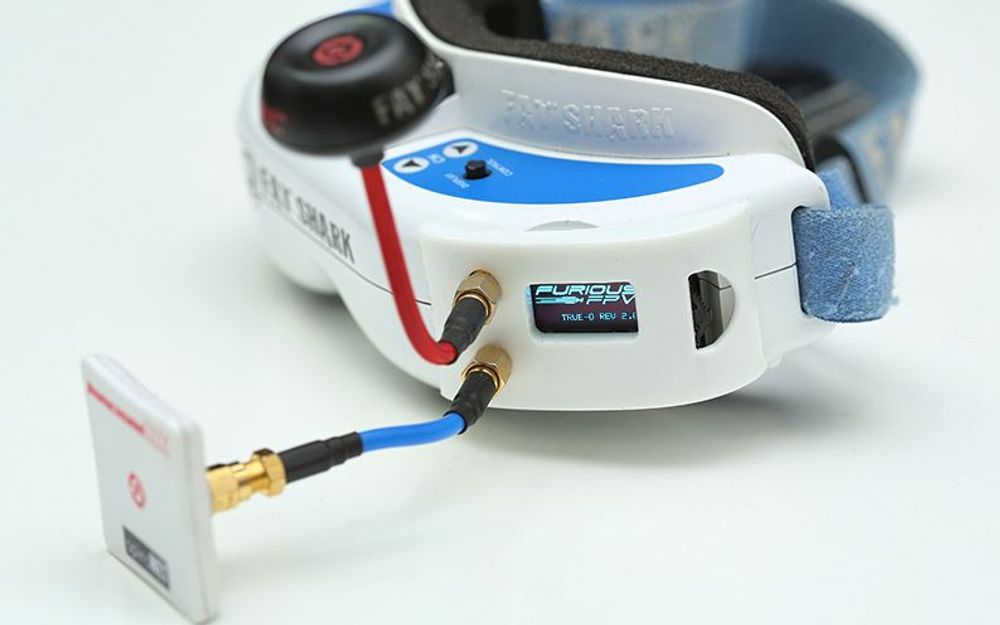
- Furious RX TrueD
- Windows Computer or laptop
Download update
Download True_D_Rev_2.0 rar file and extract it to your folders that you know where it is. I normally put it on my desktop for easy to find.
Prepare/Install updater Software
- Open the folder CH341SER from the rar file you extracted. Go to CH341SER and run SETUP.
- Click YES and it will shows the Driversetup (X64). Click on INSTALL button. It will tell you the driver is successfully Pre-installed in advance. Click OK to close that window. Closed the Driversetup(X64) window by click on the X
- Open the folder Update_FIRMWARE_TRUE_D_REV_2.0 from the rar file you extracted. Open file minimosd-extra-master. Go to Released folder. Double click on OSD-Config application file to open it. The windows MinimOSD-Extra Config Tool 2.4.1.4 r877DV will show.
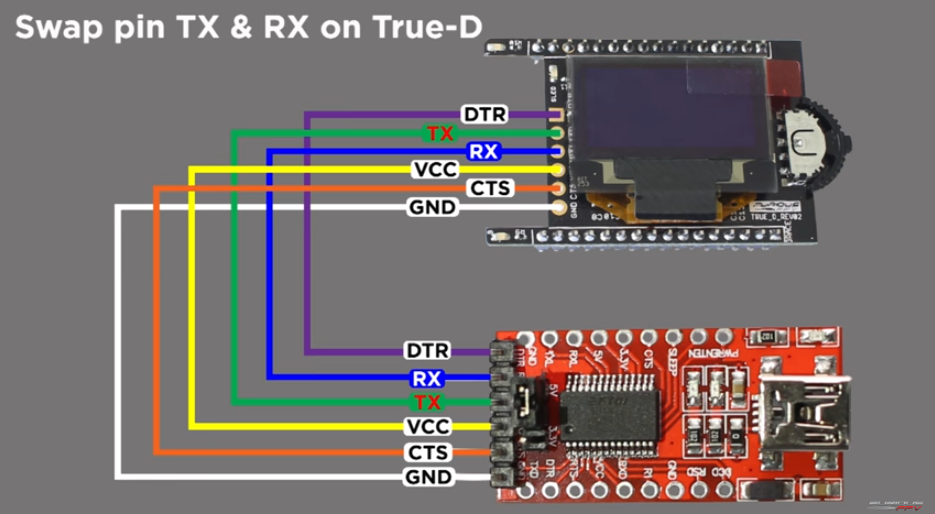
Connect your FTDI to TrueD Reciever
Open (take it off from your goggles) the Furious RX TrueD . Take out the top part of the TrueD. (The one have the wheels attached) . Connect the cables with the FDTI board as shown:
Update the Firmware
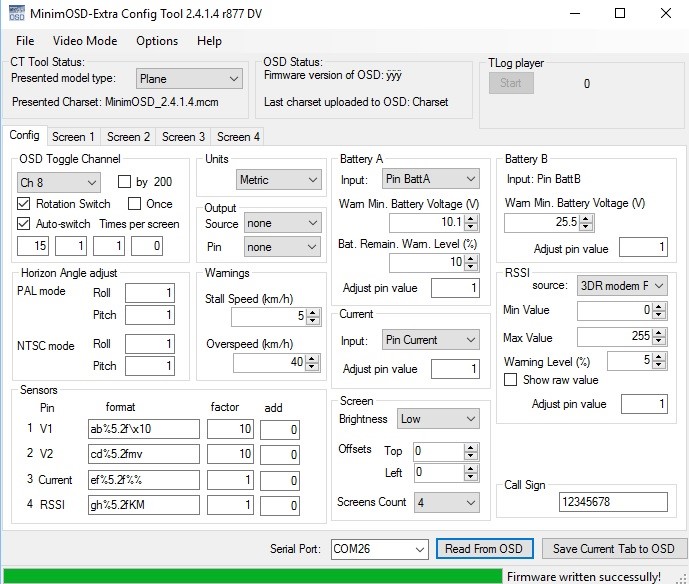
- Connect USB cable to your computer and open the MiniOSD-Extra Config Tool. Let the driver run it and when it is done it will shows you the Serial Port on the MiniOSD-Extra Config Tool. Make sure your TrueD receiver has power. If not, please check the wire connection diagram again and make sure everything is connected correctly.
- Step 1: At Serial Port, scroll down to choose your COM port. Click on Read From OSD and wait for it to complete reading

- Step 2: You noticed that Firmware version of OSD now changed from Unknow to yyy. Now, you click on Options and scroll down to choose Update Firmware.

-Step 3: You will see the window open it’s looking for the hex file. Choose Update_Firmware_True_D_Rev_2.0 folder and you will see the True_D_2.0.ino.hex file. Chose that file and click Open.

- The firmware will upload and run to 100%. Once complete you will see a message saying Firmware written successfully. Also, on the RX you will see it show as Rev 2.0.
And that is all there is to it! Disconnect the cables and plug the TrueD back into your Fatshark goggles and enjoy using the new firmware!
Troubleshooting
Error 1: Failed to talk to bootloader.

Click OK to close that message. Check on your cable connection between the FDTI and the RX. Close the MiniOSD-Extra Config Tool and reopen it. Follow the Step 1 again. It should be go thru.
Error 2: The EEPROM mapping is outdated!
An automatic update will start. Click Ok to close that message. It will said EEPROM mapping updated!. Close that window. You also see the message on the MiniOSD Tools said EEPROM read OK!
Need any more help?
If you have any questions, or something above is not clear enough just let me know by adding a comment below.