
This article will cover the important things you should know about when buying your next flight controller. I know it can be daunting with about 5 new flight controllers being released just about every week. If you just want to know which ones I think are best check out our best overall FPV racing flight controllers article (coming soon), but read on to learn the basics of what to look for in an FPV flight controller and why.
Autopilots vs Flight Controllers
The first thing to consider is if you are looking for a flight controller or a full autopilot.
- A flight controller is the brains of your drone that uses various sensors to stabilise your quadcopter.
- A autopilot is a system with a flight controller at the core, but has extra peripherals like GPS or telemetry that can autonomously control your drone from takeoff to landing.

In the case of FPV racing you only need basic stabilisation, so a flight controller is all you need. The flight controller is like a hub that you can connect other peripherals to it, like a GPS module, radio telemetry etc.. to turn it into an autopilot system. I use the definition that an autopilot has the capability of autonomously controlling your aircraft, from takeoff, waypoint navigation and landing. Having a full autopilot is overkill for FPV racing, so we will only talk about flight controllers for FPV racing here. But if you want to learn more check out our autopilot basics guide.
List of things to consider
Bare Essentials
- How many sensors do I need (DOF)
- Which IMU Chip
- The Processor
- How many ports
- Fully integrated or bare-bones flight controller
Optional Extras
- Datalogging
- Current/Voltage Sensor
- Power distribution
- On screen display (OSD)
- Race Timing
- Which Firmware

How Many Sensors? – Degrees of Freedom (DOF)
The first thing you need to consider is how many sensors you need on your flight controller. For FPV racing you only need 6DOF boards.
6 DOF
The bare minimum you will need is a 3 axis accelerometer and a 3 axis gyroscope to give 6 degrees of freedom (also known as degrees of measurement) which is often written as DOF. 6 DOF is the bare minimum you need to fly your FPV quadcopter or aircraft as this lets the flight controller keep track of your aircraft motion. 6 DOF flight controllers are popular as they are cheaper and do a great job at allowing you to fly your FPV quadcopter and can perform basic tasks like self-level your drone.
7 DOF
However, you get some FPV flight controller that includes an extra sensor to measure air pressure (your aircraft altitude) called a barometer or baro for short. This can help with maintaining altitude automatically (making it easier to fly) but mostly it is used to provide some extra information to the pilot to give the aircraft’s current altitude. So you do get some 7 DOF flight controllers
10 DOF
Lastly, you can also get flight controllers with an added 3 axis compass sensor which provides more information about the aircraft’s motion. This makes these flight controllers a 10 DOF board. Having these extra sensors make your motion readings more accurate, and having a 10 DOF board also make it possible to use a GPS for position hold and waypoint functionality. This will give the flight controller the ability to be used as a full autopilot.
The Inertial Measurement Unit (IMU)

The most common inertial sensor on FPV flight controllers is the MPU series from InvenSense. This is a tiny chip that has a built-in 3 axis accelerometer, gyro and even a compass depending on what version you get. However, for fast racing drones, the update speed and accuracy is quite important. The MPU6000 is the currently best IMU sensor to use currently for boards using the F1 or F3 processors, as it copes well with vibrations and can get gyro updates at 8Khz when connected via SPI. However, for more powerful flight controllers (F7 or F4) it is better to use the MPU6000 or ICM20602 based IMU sensors that can run at 32Khz.
To learn more about the various inertial sensors check our IMU comparison for FPV flight controllers.
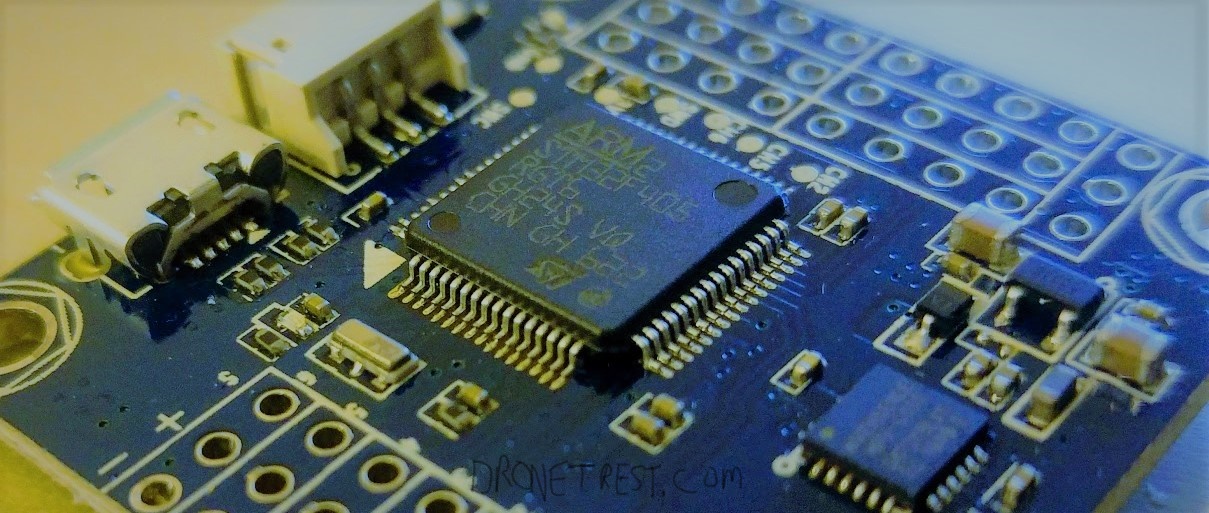
The Processor (MCU)
The processor, or rather the microcontroller (MCU) is the brains of the flight controller and the part that does all the computation. The faster and more powerful the MCU, the faster it can calculate everything you generally you have better performance as you can run the code faster. In general, most FPV flight controllers run the STM32 microcontroller which itself has some variants each with different processing power with the most popular listed in order of performance first F7, F4, F3, F2, F1. So if you are after higher performance its best to get the most powerful board. Right now F3 boards are the most popular with F4 boards slowly starting to take over as the flight control firmware evolves to take advantage of more processing power.
Right now there is absolutely no point to use an F7 based flight controller. Although supported by betaflight, raceflight the amount of CPU usage on an F4 board with all the options ticked is still only about 20%, so using an F7 board you will only be using about 5% of the CPU. However in the years to come as the code gets more complex and, sensors get faster and calculations get more intensive then there will be a valid reason to start using F7 boards.
UART Ports
The number of UART ports is decided by the MCU that you choose. But I am mentioning this here as it is something to think about as not all flight controllers have connectors for all the available UART ports so it is worth checking the specs of the flight controller.
What are UART ports used for?
UART ports (or universal asynchronous receiver/transmitter) are serial ports that some devices use to transmit/receive information between them. The most common forms of this are for digital receivers (SBUS, Spektrum), telemetry and for your OSD (on-screen display), and GPS. Each device will use one UART port, so it is generally better to have more so you have more flexibility when building your quad.
The number of UART ports are directly linked to the MCU, however, depending on the board design (particularly the smaller boards), not all of the ports are accessible. STM F3, and F4, F7 MCU have 3 dedicated UART ports which are enough for most applications (1x for a serial receiver, 1x for OSD, 1x spare for GPS, Bluetooth etc).
However, if you have used all the hardware UART ports, there is a special setting called softserial, which uses the MCU processing power to emulate an extra two UART ports on your flight controller. But it is only suggested to use this if you have to as it put more load on the processor. Also never use softserial to your receiver.
Fully Integrated, or Separate Components?
Now that you have covered the bare essentials, it’s time to consider all the extra features you can add to your flight controller.
In general flight controllers go down the road of either being fully integrated, or bare-bones, or somewhere in between. This gives you the option to find something with all the extra features you want.
Fully integrated boards are great as they are quick to install, and assuming they are designed properly, everything should work well. You can even go as far as having a flight controller integrated with 4x ESC for the ultimate integration, so building your quadcopter will take no time at all and be a neat build with no extra wires. However, the main disadvantage is that if something breaks/fails you will need to replace the entire board which could be expensive. However this can be offset by the ease of use, and a fully integrated FC can be cheaper than buying all the separate parts.
For example, the Omnibus Asgard (pictured below) is a fully integrated flight controller with the FC, OSD, PDB, Current sensor and 4x ESC built into a single board!

However at the end of the day with so much innovative FPV gear coming to the market each week, you will probably be able to find the best balance for your needs of the two.
The rest of this article will look at some of the extra features you might want to consider in your flight controller.
Data Logging
Data logging is the black box on your flight controller that records all of the data that you can look at after your flight. It is useful for troubleshooting problems and also to fine tune your FPV racer to get the best possible performance. However, there are a couple of options when it comes to data logging available on flight controllers as discussed below.

It is important to note that the number of variables you log and the speed of logging will have a significant impact on your CPU utilisation. So if using a slower F1, F3 MCU keep an eye out on this while deciding what to log to ensure you don’t overload your MCU.
Dataflash
The most common and cheapest method is via a data flash chip on your flight controller. They are great as they are small, robust. However, they can’t store much data and are much slower when compared to SD Cards. Currently, most data flash chips you get on flight controllers are either 64Mbit (8 MB of data) or 128 Mbit (16 MB of data). Depending on how much data, and how fast you decide to record it, a 128 Mbit data flash will be full after about an hour or so of flying.

SD Card
The other option that some flight controllers offer is to use a Micro SD Card slot. Although it’s much bigger and slightly heavier, it offers a huge amount of storage capacity. When using a 16Gb card you can basically record every single flight at the fastest logging speed for the rest of the quadcopters lifespan and still not run out of space!. However, if you have a bad crash, the SD card can sometimes pop out which can be hard to find.

Current/Voltage Sensor
Most flight controllers include a voltage sensor which measured the battery voltage that gives you an idea of how much longer you can fly for. It can also be used to sound an alarm to warn you via a buzzer, or send back to you via telemetry, or displayed on your OSD.
Some more advanced flight controllers also include a current sensor which provides a much more accurate measure of your battery capacity remaining. However, it is important to check the specifications of the current sensor, as some have a current limit. So if the board only has an 80A current sensor, then you can only use a maximum of 4x 20A ESC. Otherwise, you risk damaging the current sensor. There are some technicalities with this that means you probably could use bigger ESC, but I will not get into this right now, as that is a separate guide.

Both the voltage and current sensors require some calibration to work properly.
In general, always make sure your flight controller has a voltage measurement capability as the minimum (most do anyway). But if you do you can always use an external voltage monitor alarm.
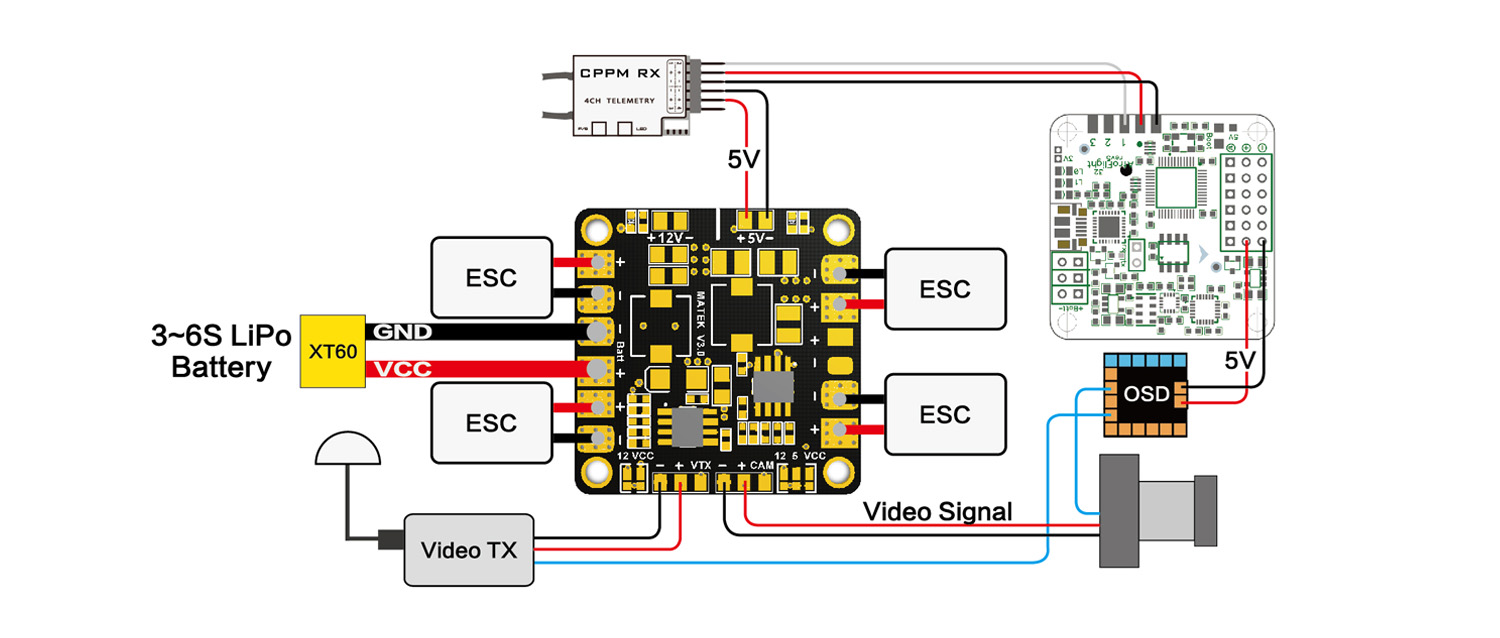
Power Distribution
A power distribution board makes it easy to route the power from your battery to all of your electronics.
Standalone PDB
It is most common for most drone builds to use a standalone PDB. This is a separate PCB mounted under your flight controller (or built into a frame). This is helpful as if you want to upgrade/replace your flight controller you can still use the same PDB. Also, many PDB have extra features like a built-in 12V and 5V outputs to power your FPV gear while others will also include a current sensor or OSD.
You also get 4in1 ESC’s which automatically include all the power distribution for all the motors/ESC. Some of these 4in1 ESC also has a 5V output to power your flight controller to make things very neat and tidy by having all the electronics on a tower stack. However, some 4in1 ESC do not include any power output so you will still need to use a PDB in the stack. This in itself can be good and bad depending what you are after as the PDB will also have a 12V output for your FPV gear, and also possibly a current sensor, or OSD.

Built-In PDB
Some flight controllers (such as Kombini shown below) include a built-in power distribution board which makes it very easy to connect and wire your quadcopter up, and also makes it a very neat installation. Just make sure that the rating for the built-in power distribution board is good enough for the ESC/motors you are using as if you burn this out you will most likely need a new flight controller.

However, if you are looking for the neatest as lightest possibly build, then having everything integrated is the best way forward

Voltage Regulator
A voltage regulator will convert the voltage from your battery to a specific voltage which can be used to power the flight controller itself (that runs at 5V), or your FPV gear (5V or 12V). Basically, all power distribution boards include a voltage regulator so it is not critical that your flight controller has this.
However, if your flight controller does have this it makes it convenient as you can directly connector your battery to your flight controller. Furthermore, if this is the case, the flight controller includes a built-in power distribution board to make for a very neat installation with few wires.
On Screen Display (OSD)

An on-screen display device (OSD) is used to overlay some information directly onto the live video feed. This allows you to see vital information such as battery voltage, or your flight speed (requires GPS). Some people love this, others dislike OSD as they feel it gets in the way. I generally like to use an OSD (but only show essential info) as it also allows you to change flight controller settings at the flight field via the OSD menu.
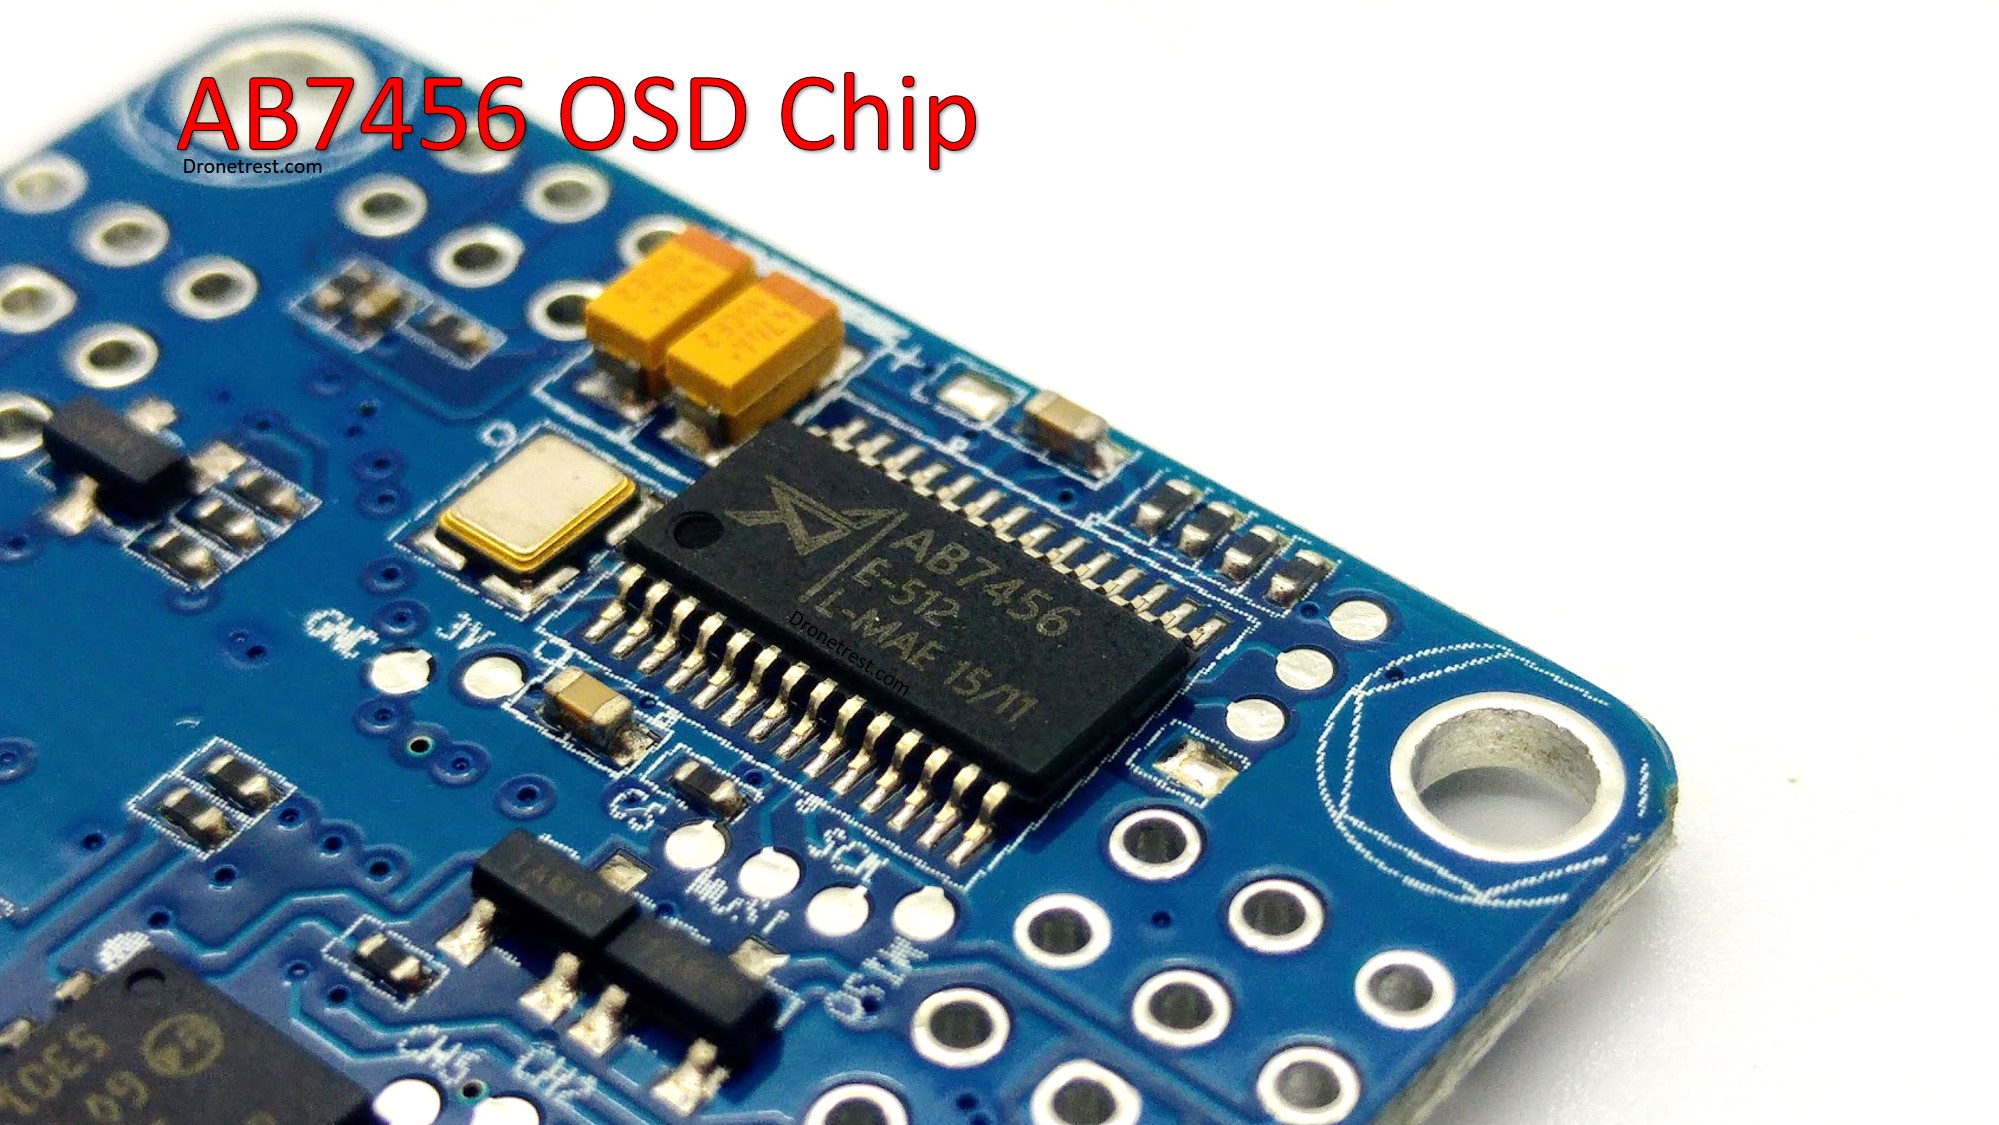
Currently, the two main OSD chips are the MAX7456, and the AB7456 OSD chip. Both serve the same function but some of the more recent OSD modules use the AB7456 OSD which is less sensitive and does not break as easily so if in general, it’s best to get an OSD that uses this chip. In addition, these newer AB7456 can be configured directly within the betaflight GUI so you don’t need to fuss around with yet another software tool for configuration.
Separate OSD

It is relatively common to have a separate OSD board, some can mount directly to your FPV camera, while others stack onto your flight controller. Either way having a separate OSD board gives you lots of flexibility should you need to upgrade your flight controller you can still use the same OSD board. But because it is a separate component you will have more wires to connect. So some hardware designers have started integrating the OSD into flight controllers, or PDB, or a video transmitter to make for easier and neater installation. As shown to the right the Innova OSD/VTX combines a tiny OSD board with a video transmitter.
OSD Built In
Some flight controllers have an OSD module built in which is great as it means you do not have any messy wires, and your overall build it smaller. Due to the sensitivity of the MAX7456 chips its recommended that you go for an integrated OSD that uses the AB7456 OSD (found in the omnibus flight controllers) as you can configure them directly within betaflight and do not need to fuss around with FTDI adapters, or annoying DIP switches.
Other variations include OSD built into the power distribution board or video transmitter. This essentially gives you the best of both worlds where you have the OSD integrated into a component, but still, have the flexibility of having it separate from your FC should you need to upgrade.
Race Timing
Not as important as it once was, many flight controllers still have a provision for an IR LED that is used for race timing. Each drone in a race transmits a unique pulse and each time you pass the start-finish line, your lap time will be recorded. However with this new technology of measuring your VTX signal as it passes the start/finish line is a much easier method for timing as it does not require any extra equipment to be mounted to your drone since FPV racing drones already include a VTX.

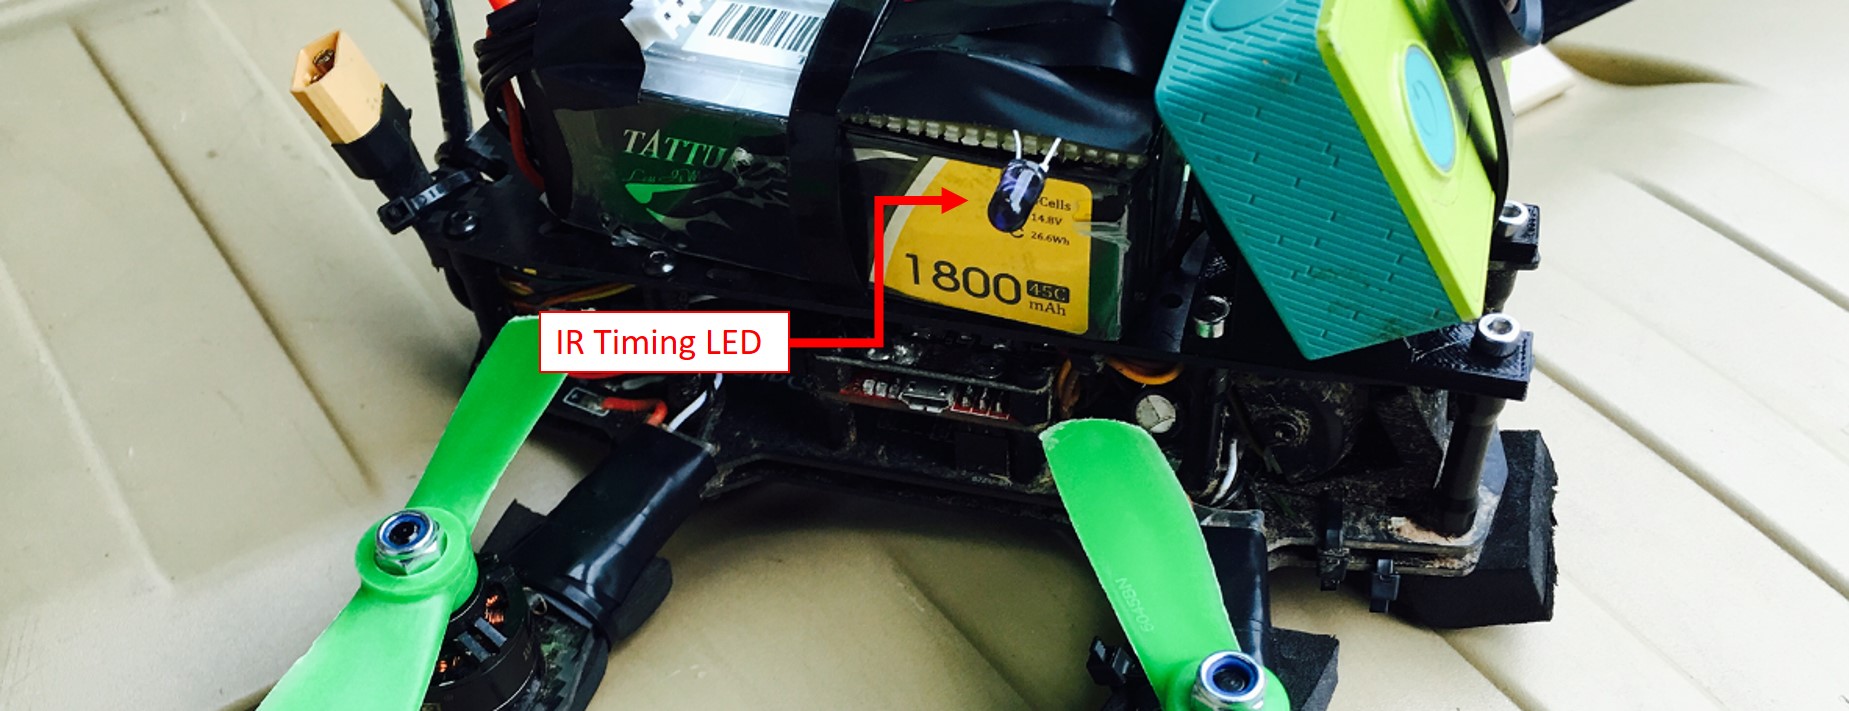
IR LED for Race Timing
The last thing you might want to consider is if the flight controller supports an IR LED which is used to time lap times. The flight controller turns the infrared LED on and off in a particular sequence that corresponds to your quadcopter and each time you pass the start-finish line your lap will be recorded via a lap timing device. This is essential if you plan to compete in any FPV races, but if you do not plan to do this then it is not really necessary at all.
Lap timing using VTX signal
Team Black Sheep have been working on wireless lap timing tech that uses your video transmitter signal so you don’t need any LED! The way it works it is has a very narrow beam receiver that will pick up the VTX signal only when you pass directly over it, and can accurately time your laps. Fortunately, they have released a personal lap timing that does not require any IR LED, then you should check out the TBS RaceTracker as it uses wireless lap timing using the signal from your video transmitter on your drone, so will work with any FPV quad that has a 5.8Ghz video transmitter.
FPV Racing Firmware
By now you should have a basic idea on what to look for when buying a new flight controller. So it is worth checking what firmware the flight controller supports. This should be clear on the product details.
One thing to double check is that if the board (flight controller) is officially supported by the firmware base. As some new flight controllers require you to download the firmware from the manufacturer’s website and upload it yourself via the configuration app. This in itself is not exactly difficult, it just means that you have to check yourself when a new version is released.
Two main FPV racing firmware bases
There are three main firmware projects currently available
- BetaFlight – Build from Cleanflight, and is currently the most popular and supports just about every flight controller
- Cleanflight – Initially build from Betaflight, and used to be the most popular, but usually has fewer updates than betaflight and is considered less cutting edge. However, as of Jan 2017, Cleanflight V2.0+ has been based on Betaflight so in terms of features and performance, it is very similar. Cleanflight has official flight controllers such as the SPF3, and the SPF4 Evo.
- RaceFlight – Initially started to take advantage of more powerful flight controllers, and also supports a wide range of flight controllers. Not as popular as BetaFlight.
If you want to add GPS and turn your FPV racing flight controller into a full autopilot, you should check out the Inav project.
Any Questions?
I hope that this has given you some basic ideas on what to consider when buying a new flight controller to help you make a more informed decision. If you have any questions or suggestions or some advice please ask/add them below.


