If you’re on the verge of purchasing a drone, you must have already considered several options. In this case, you should already know that there are different models, builds, options, and features that can confuse an inexperienced user. However, if the drone world is not new to you, then all these options will make you feel like a child in a candy store – you want them all but you don’t have enough money.
If this is the case, the best scenario where you don’t ruin your savings and still get exactly what you want is with FPV quadcopter kits. These can be delivered already assembled or in pieces and you can have lots of fun putting everything together. It all comes up to the level of experience you have working with drones. Anyways, the big advantage with kits is that they offer an incredible level of customization!
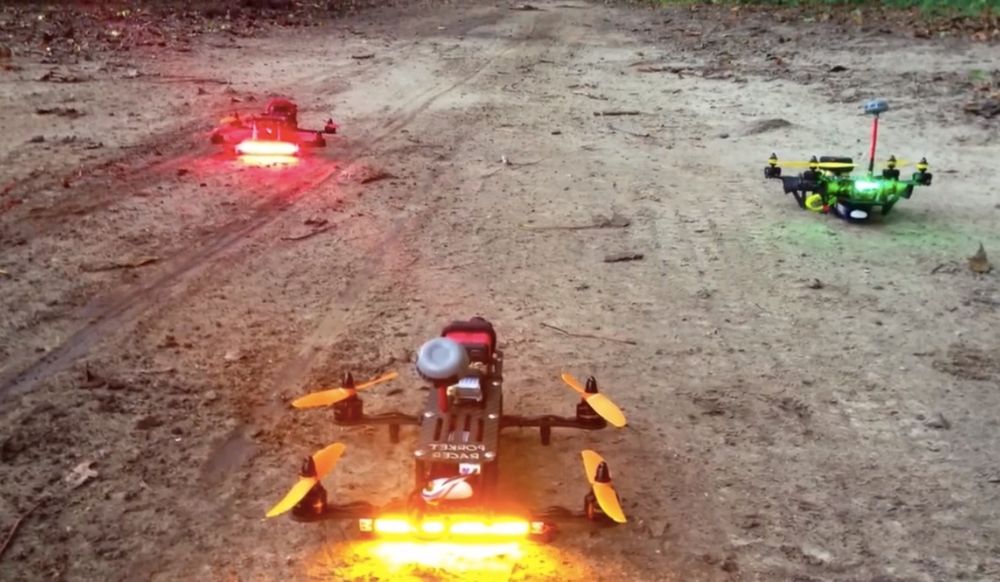
Customization is extremely important, especially if you plan on using your drone in FPV racing. Some call it the geek sport, but FPV racing is a fun, adrenaline-filled activity and knowing you built the drone that leads you to victory is absolutely amazing! But, to have that victory, you need to squeeze as much performance as possible out of your machine. Add to this the fact that drone technology is advancing rapidly, you will want to take advantage of the modular design an FPV kit offers you, allowing you to change parts, perform maintenance, and test different flight configurations easily.

On the other hand, as a beginner racer, the opposite is true. You might want to start with an inexpensive RTF option. This is because crashing will be part of the learning curve, and it is best to hone your skills on a sturdy, user-friendly flyer.
A Few Tips for Building Your Own Racer
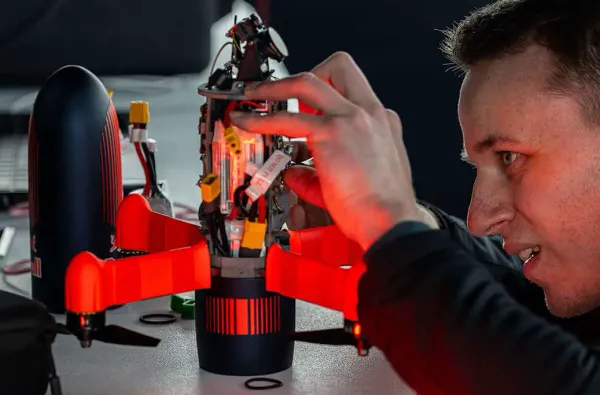
Once you build a few quadcopter kits, it becomes apparent that there are some tricks of the trade, which you wish you would have known from the get-go. The following are a few insights to building a custom racer out of an FPV kit:
#1: Batteries

When it comes to batteries, bigger isn’t always better. At first, you should see if you can get a smaller battery – there is a difference between a 2200 mAh battery and a 1000 mAh one. You will have a better flight time with the former; but there is no sense flying around for 10 minutes, if the drone handles like a bus.
Sticking with the battery, you should consider getting equipment which is 3S and 4S compatible. If your flier isn’t able to handle 4S batteries, you can find yourself having to build another one. We are specifically speaking about ESC’s and motors, because that’s where the main difference comes from.
#2: The Frame
For the frame of your racer, you should go with carbon fiber. There are lots of other options, but carbon fiber is stronger and lighter. You should also avoid carbon-glass options. Just spend the extra money for a light and strong carbon fiber frame. It will take a very nasty crash for it to break and it is the go-to material for the best frames out there. It is really is worth the extra money.

#3: The Transmitter

When it comes to the VTX transmitter, consider using pigtails. There are enough pictures online of drones with the transmitter sticking out of the back, and connecting directly to the antenna, but this is a sure-fire way to break it. Just by using an inexpensive pigtail, you are properly housing and protecting your VTX, which can cost you quite a bit. This way, you are only risking breaking a 5 dollar pigtail instead of an expensive part of your kit.
A Few More Tips
Another important point is keeping the weight down. You might think using screws that are a bit longer is a victimless crime but all the little things on your aircraft drag it down and lead to less flight time and undesirable handling. It is the difference between an agile, nimble flyer, and a bulky cruiser. It is one thing to want your drone to look cool, but if you are up for flight performance, consider stripping everything down.
If you are sold on the modular design, this next point is a bit counterintuitive. If you do not plan on taking your machine apart very often, you can directly solder your wires. You will find yourself flying and crashing your aircraft quite a lot, and will not have a need for them to be that modular. Just get rid of bullet connectors and direct solder everything. This is also on par with the above tip of weight reduction. However, there is a fine line here – you should solder as much as you are comfortable with, and not create daunting situations.
Get rid of the landing gear. Unless you are doing aerial photography, in which case keeping them is sensible, for a racer, there really is no need. When you are building a quadcopter for racing, ditch the landing gear, because it can get snapped off and lost, or even worse, take out some of your ESC wires with it.
![]()
Take care in getting the motors and the ESC’s to go with your battery and props (see our guide to choosing the best motors). This touches on the 3S and 4S compatible racer. If, for example, you have 4-inch propellers, and want to test out 6-inch ones, make sure you pick your motors wisely, and make sure you’re not over killing something, or underpowering your aircraft. It’s bad for the motors. There are 3 good motors, as a general tip: DYS 1306’s are best for 3-inch moving into 4-inch props, 1806’s for your 4-inch, moving into 5-inch ones, and then there are the 2205’s or 2206 cobras good for the 5-inch bullnose or the 6-inch props.
Get one extra motor, one extra ESC. You will be glad you avoided waiting around for your package to arrive, and not flying your racer. Also, get into that state of mind where you are accepting the idea of crashing and breaking your finely tuned quad. It is an important part of this wonderful hobby!
Some of the Best Kits
When you consider buying an FPV quadcopter kit, you can approach it in different ways:
Buying an all-included kit that just needs assembling

Here, the GB190 190mm DIY Carbon Fiber Frame Kit, is a stellar kit with fantastic components, awesome motors (4 x EMAX RS2205 2300KV Motor) and ESC’s ( 4 x DYS XS30A ESC), a sick FPV camera (RunCam Swift Camera), rocking a Aomway 5.8G 3dBi Antenna and a 190mm Carbon Fiber Frame.
The kit is sporting the SP Racing F3 ACRO flight controller with cross-platform GUI (Windows/Linux), and an onboard black box which stores sensor data.
You will have an absolute blast flying this whole setup. The price is around $270. But you will still need to buy a battery, charger and R/C controller.
Buying a frame and purchasing the electronics
With this choice, you are entering the big boys league. You are choosing a sturdy frame and custom adding your own ideas to it.
The Orion 155x is one of the most elegant frames you are going to see. It’s designed to run 4-inch props and it is very light. The alarmingly small number of pieces it comes with should get you excited, as the whole goal of this frame, is to make a formidable racer. With a package that costs around $40, you get the main plate, a stack protection for FPV, made out of two pieces, standoffs, and a 3D Printed Camera mount.
It also comes with its own PDB (power distribution board).
If opting for this approach, you should consider how confident you are at building racers, as it can get a bit tricky.
Okay, now that you know everything there is about choosing your FPV drone kit options, the choice is yours.
This article was written for dronetrest by Jack from MyDroneLab, head over there to see more of his articles