Drone FPV goggles are one of the most important things when it comes to the FPV experience since you use a pair of goggles to see what your quadcopter sees. Just like most things in the FPV hobby, just because something is expensive, does not make it the best. In this guide, I will help guide you through the process of making the correct decision when it comes to buying yourself a set of FPV goggles.
What are FPV Goggles?
Drone FPV goggles are portable screens that you wear on your face to allow the FPV pilot to view the live video from their FPV quadcopter. They come in all sorts of sizes, with various features and suit just about any budget. Because FPV goggles are one of the primary devices you use to fly your FPV drone, it is the device that literally teleports you inside your quadcopter. Read on to learn everything you need to know to choose the best one for you.
How do FPV goggles work?
To understand FPV, the easiest analogy is to think about how television works as it is pretty much the same thing, just on a much smaller scale. Your drone has a camera on it that captures a video. This signal is sent to a video transmitter, which broadcasts a signal wirelessly (like a television studio would). The FPV goggles on your quadcopter are like a television set that will pick up the signal. But to be specific, the video receiver will pick up the signal and display it on the screen inside the goggles. Most FPV goggles have an integrated video receiver or have the ability to plug one in via a module bay. Many goggles also have a video input connected via an AV cable, or HDMI so you can actually connect it to your TV, or computer to watch TV, or have an immersive experience when playing on an FPV simulator.
Form Factor – Box Goggles, Low Profile Goggles, FPV Monitor
The first thing you need to consider is what form factor you want to use. Right now there are three main form factors that you can choose between for your FPV viewing device. These are summarised below.
Low Profile Goggles
These are the most common style of FPV goggles. They are small, and have a small LCD screen for each eye, along with a special magnification lens to focus and enlarge the picture. This gives you a big screen experience in the small form factor of some goggles. Low profile goggles are popular among FPV pilots because they are small, comfortable to wear. They also fit easily inside your backpack which makes it much easier to lug them to your flying field. The downside of low profile goggles is that they are more expensive than box goggles because they use two specialist micro LCD screens. Depending on your face shape, getting the two LCD screens lined up exactly with your eye can also be a pain (read more about this in the IPD section of this guide)

Box Goggles
Box goggles essentially consist of a regular LCD screen with a special magnification lens enclosed by a box to keep everything together and stop any sunlight getting in. You can think of these like the VR headsets you can buy for your smartphone. Box goggles are popular among beginners as they are usually much cheaper than low profile goggles. They are also easier to use as you don’t need any IPD adjustment (more on IPD later) You can get an excellent screen with high resolution. The main downside of box goggles is that they are big and bulky and do not always fit easily inside your backpack. However because they are big, if you wear glasses you can sometimes still keep your glasses on while wearing these which is great (no need for contacts, or special lenses on the screen).

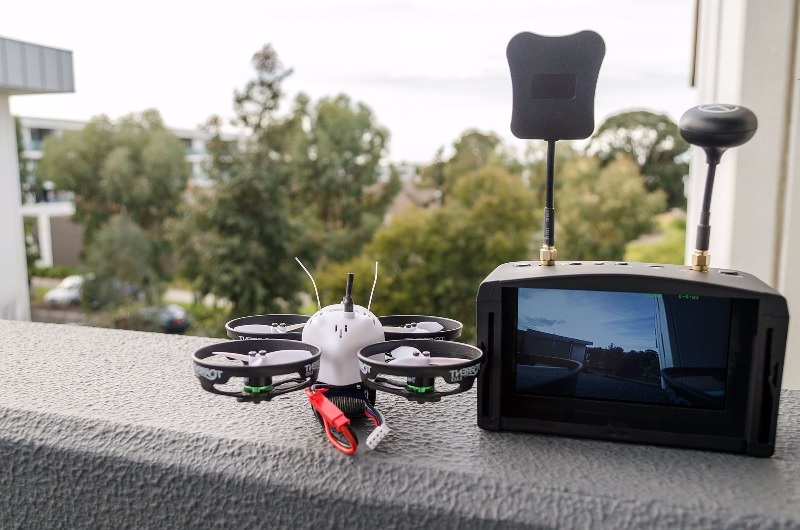
FPV Monitor
This is just a screen, that usually has a built-in FPV receiver. These are mostly used by aerial photography pilots as it gives you the ability to look up to see where your drone is, something you cant easily do with FPV goggles. You can still fly FPV with a monitor, but goggles give you a much better experience.
Price
FPV goggles probably have the widest price range in the FPV hobby. You can get a basic monitor for as little as $30 to get you started. But on the other hand, a top of the range FPV headset can cost you up to $500. Because you wear FPV goggles, a crash will not destroy them. So when buying some goggles its best to buy the best that you can afford as they will outlive many of your multirotor drones.
Field of View (FOV)
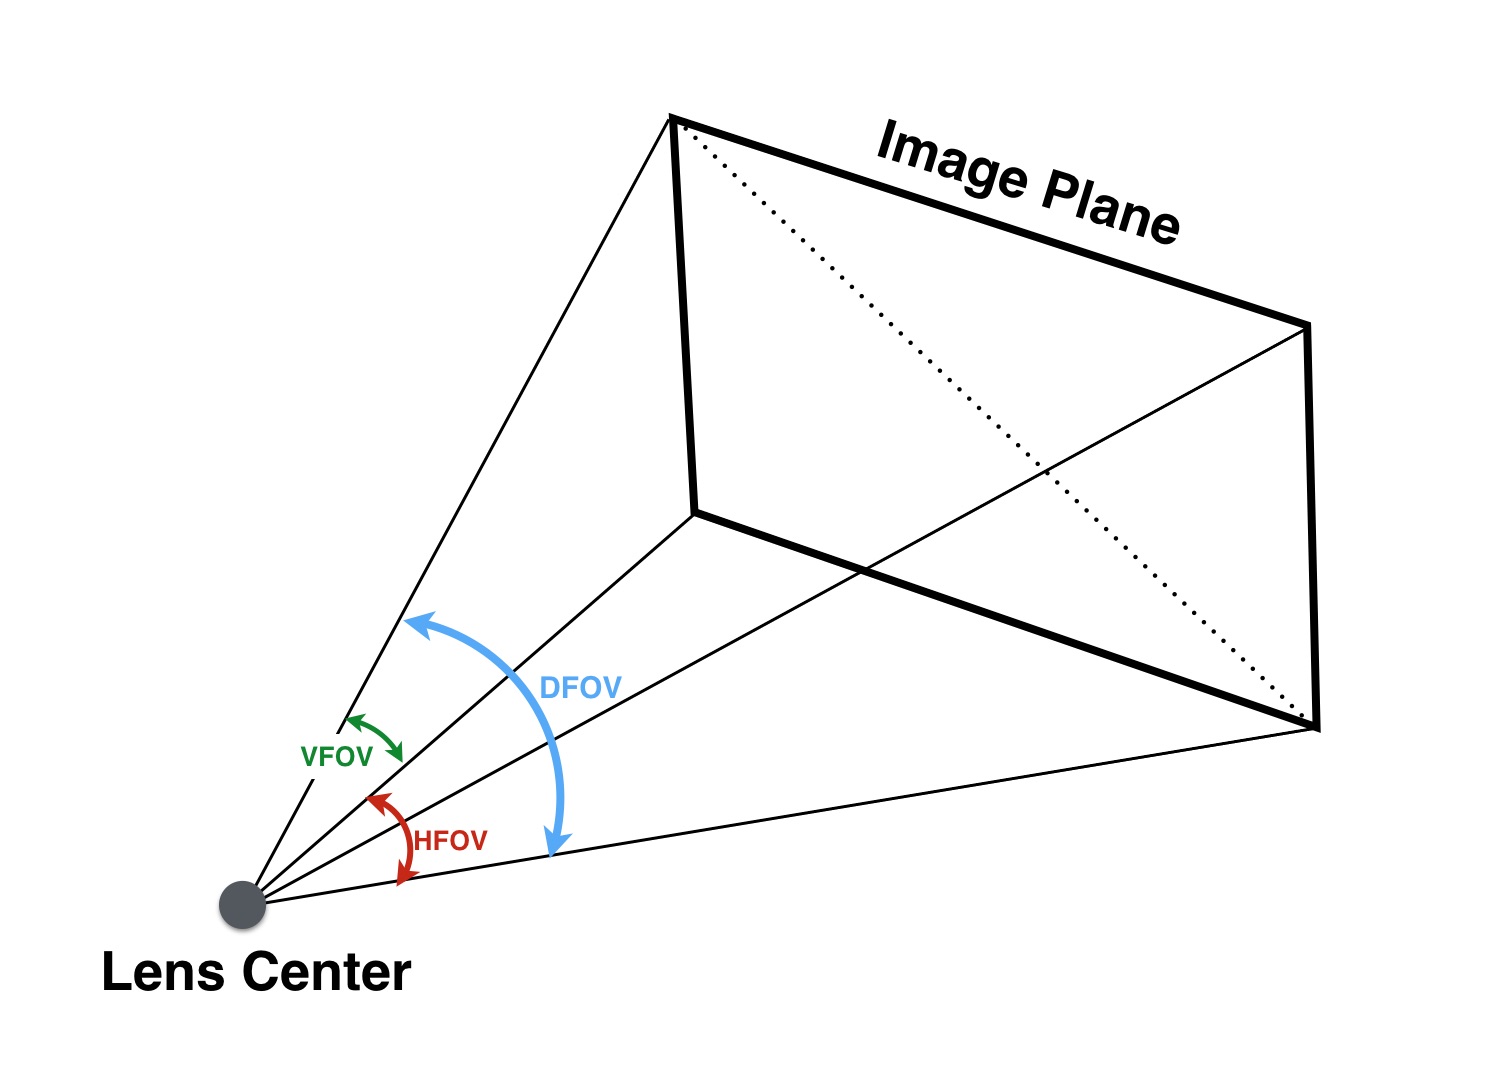
Field of view (FOV) is the measure of how big the FPV screen appears. When it comes to FPV goggles, this is measured as the angle from the centre of your eyes to the diagonal edges of the LCD screen, this is shown in the image below as the DFOV (or diagonal field of view).
The field of view for most FPV goggles range between 25 degrees to around 80 degrees. The perfect field of view is largely a matter of personal preference and is subject to a lot of debate on the internet. Larger FOV gives a bigger image that you see which help immerse you as the video takes up a lot of your vision, however, this means that you may have to move your eyes to see the edges of the screen. This is not ideal for FPV racing when travelling at well over 100Mph. Another drawback of larger FOV is that the entire screen is not in the central ‘sweet’ spot of the lens, so often the edges of the screen become slightly blurry, particularly if eyes are not aligned correctly with each lens. It is more common to have larger FPV between 50-80 degrees on box style goggles due to the larger LCD screen. So if you want a bigger screen, get a larger FOV, but anything over 80 degrees is a bit much in my opinion.
Smaller FOV make the image appear smaller and is more common in low profile goggles typically ranging between 25-50 degrees. Avoid anything less than 25 as in my opinion this is too small. Most FPV racing pilots and goggles have a FOV of around 40 degrees which give the biggest screen without the need to move your eyes to see the edges.
Aspect Ratio
The two aspect ratios you can use with FPV goggles are either 4:3, or 16:9. Just like with FOV, aspect ratio also comes down to pilot preference. 4:3 was originally the default because all FPV cameras only output 4:3 images, so if you had a wider 16:9 screen, the video would just be stretched. However, as FPV has gained in popularity and technology has advanced many FPV cameras have the option to output a 16:9 image. This gives you a wider, unstretched view of the scene which can help in flying. It is important to have your camera and FPV goggle screen at the same aspect ratio, otherwise, the image you see will be squashed or stretched. It is also important to note that a few FPV goggles and cameras give you the ability to adjust aspect ratio via software. In general, having a 16:9 aspect ratio is better in the long term because as technology advances and HD digital FPV which runs on 16:9 will become a lot more affordable, allowing you to take advantage of this with your goggles in the future.

Interpupillary Distance (IPD)
IPD is the distance between the centre of your two eyes. This value is mainly important for goggles that have a lens for each eye, (such as low profile goggle) as each lens needs to be aligned with your eyes in order for you to have a good viewing experience.

Because we are all unique, there are no one-size fits all goggles here. Fortunately, most manufacturers allow for IPD adjustment, so you can move the lenses/screens to get them to be perfectly aligned with your eyes. Most FPV goggles have an IPD adjustment range between 59-69mm. The only problem here is that if your IPD does not fit into this range (you freak), you will not have the best viewing experience. But for now, if you don’t get the IPD exactly aligned, the edges of the screen will be blurry. This is because your eye is not aligned with the focal point of the lens. If this is the case for you, it is better to rather use box goggles, or try out some low profile goggles with a narrower FOV which usually have a wider focal point range before you notice blurry edges of the screen. Hopefully in the future manufacturers will start to accommodate wider IPD ranges, but for now, we just have to deal with it.
If you wear glasses you can ask your optometrist for your IPD to get an exact measurement, but otherwise, you can try to measure it yourself by taking a photo in front of a mirror with a ruler across your eyes. This will give you an indication if the FPV goggles you want to buy will fit with your eyes or not.
Resolution
The resolution is probably something you are already familiar with, and no it’s not the thing you do at new years. But if not the resolution of your FPV goggles give you an indication of how good the LCD panel is. The higher the resolution, the clearer the image looks and you cannot see the pixels. Higher resolution goggles are also more expensive. You can pick up a relatively cheap set of goggles with a resolution of 320×240 pixels, which although is usable to fly with, is far from being pleasant. I would suggest you spend a bit more and get goggles with at least 640×480 resolution. I would also avoid getting FPV goggles with a resolution above 720p. Given the current technology and future developments, it will take a good few years until we see digital FPV resolutions above 720p at affordable prices. So, for now, 720p is good enough for the lifespan of your FPV goggles.

Another thing to note is the resolutions I talk about in this section are dependant on the aspect ratio of the screen, so the numbers will vary with aspect ratio. So use those numbers as a guide.
Video Receiver
The final main factor to consider is the video receiver, as this is the key components that will pick up the video signal from your FPV drone. Some goggles have a receiver built in which is great as it makes life easy and usually keeps the costs down. Other goggles have a module bay that lets you plug in your own receiver, this is great as it gives you more flexibility and a lot of options for what receiver you want to use as the technology changes in the future.

Other things to consider
Now that we have covered the main aspects you should consider, here is a list of secondary factors you may want to consider.
HDMI input
This is particularly nice if your goggles support HD resolution. This lets you use your FPV goggles with your computer. This is great for FPV simulator practice as it is that one step closer to the real thing. Most goggles will support analogue video input (if you want to use an external receiver), but this signal is much lower resolution and most PC’s do not support analogue video output. Having an HDMI input on your goggles also make it future proof for when digital FPV systems become more affordable and mainstream.
DVR (Digital Video Recorder)
Having a DVR built into your goggles let you record the video stream directly to an SD card. Although the quality is not great, recording your DVR footage can be priceless to help locate a crashed drone, or review a race to see how you can get better.
Audio
Having an audio output let you plug in headphones to whear the audio from a microphone on your drone (usually built into the camera or video transmitter). I myself do not care about the audio that much, but some pilots swear by it as it gives them an extra sense to know how the quadcopter is behaving.
Adjustable Aspect Ratio
Some FPV goggles let you switch between various aspect ratios so the video stream does not appear squashed or stretched. This is a particularly useful feature as you are not limited by using only certain aspect ratio cameras with future FPV quadcopter builds.
Diopter Lens Support
If you wear glasses (long or short sighted), having the ability to insert additional lenses onto your goggles is almost a necessity. Adding a dipoter lens to your goggles will help focus the screen without the need for you to wear contacts.
Faceplate Fan
If you fly in hot, humid or cold climates, your goggles will probably fog up, and this is not something you want to happen in the middle of a flight. This happens more commonly in low profile goggles which is why many of them include an integrated fan to prevent the optics from fogging up.
3D FPV Support
Although a rather small and expensive niche, you have the ability to add a stereoscopic camera to your quadcopter to give you 3D support. But only some FPV goggles support 3D FPV. However if you ever have the change, or money to try this out it is very addictive and immersive. The only problem is that with FPV you do crash, and due to the size and expense of the 3D cameras, this is a rather uncommon sight at your local FPV flying spot.
Keep your goggles out of the sun!
One last thing to note is that once you have your shiny new FPV goggles, always take care to keep it out of direct sunlight (when you are not using them). Because of the optics, they essentially act like magnifying glasses and if exposed to direct sun for a period of time, the suns rays can burn your LCD screen.

Thanks for reading this guide and I hope it helps. If you have any questions, comments or suggestions please ask them in the comments below. If you have not already be sure to check out the dronetrest forums to talk to like mined drone fanatics. Happy flying!